
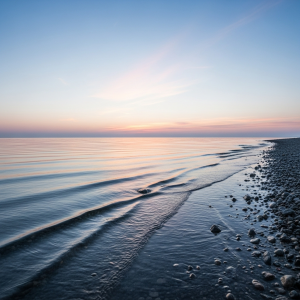
![Photorealistic seascape, [golden hour] at [rocky UK coastline or dune-backed beach]](https://betterbitbybit.com/wp-content/uploads/2025/08/imagen-4.0-ultra-generate-preview-06-06_Photorealistic_seasc.png)
Photographing the ocean is the way I slow down and actually listen to the water. I go to the shore with a simple plan: breathe, watch, and translate what I feel into frames that feel alive later.
The smell of salt, the rumble of swell, the pull of tide lines — these are cues I use to decide where to stand, what to include, and when to press the shutter. I’m not chasing trophies.
I’m trying to make images that carry the calm, the awe, and sometimes the unease that the sea gives me. In this guide, I’ll share how I prepare, choose gear that serves the moment, read light and motion, compose with intention, and edit without losing honesty.
By the end, you’ll have a clear, practical path to create ocean photos that resonate with you and the people who see them. In real life.
The Pull of the Ocean: Why It Resonates
Sensory anchors I use to decide what to shoot
I start with what I can feel: the low thud of waves, the tang of salt, grit under my boots, wind pushing at my jacket. Those cues tell me where the story sits.
If the wind roars across the beach and rips foam off the crests, I’ll position side-on to catch the spray in profile. If the tide slides out and leaves mirror flats, I’ll go low to the sand to turn tiny ripples into leading lines.
Research on natural soundscapes shows they reduce stress and improve focus, and I find that clarity helps me choose a single idea per frame rather than trying to cram everything in.
The emotions I aim to bottle
Different conditions pull different feelings from me:
- Calm: pastel dawn, small swell, long intervals between sets.
- Awe: heavy surf, towering clouds, shafts of light.
- Solitude: empty winter beach, distant gulls, fog softening edges.
- Renewal: first light after a storm, clean-edged waves, sand freshly combed by the tide.
Naming the feeling first stops me from sleepwalking into generic “nice sea” shots.
Turning feelings into visuals
I translate mood with simple choices:
- Texture vs flow (shutter speed): at 1/500s the sea looks muscular and present; at 1–2 seconds it starts to breathe; at 15–30 seconds it becomes memory. When I wanted quiet after a hectic week, I set a 6-stop ND and shot 20 seconds as a set rolled through. Instant exhale.
- Weight and balance (composition): for calm, I give the horizon room and use negative space; for drama, I compress with a longer lens and stack waves, rocks, and sky until the frame feels full.
- Color honesty: cooler white balance leans into steel blues on overcast days; a slightly warmer balance keeps golden hour from going radioactive. I nudge, not reinvent.
Real scenes, practical decisions
On a gusty evening at Newquay, spindrift kept hitting my front element. I pivoted 30 degrees off-wind, used a CPL to tame glare, and waited for backlit spray.
The photos felt fierce because the light, angle, and shutter (1/1000s) matched that mood. Next morning, same spot, glassy tide pools formed.
I went wide, kneeled to the reflections, and shot at 1.3 seconds with an ND. Same beach, completely different heartbeat.
Pitfalls I avoid
- Cliché horizons: I level first, then commit to a deliberate high or low placement with a reason. Wobbly horizons kill connection.
- Over-saturation: if the blues glow like a screen saver, viewers stop believing. I protect highlights and let the sea’s subtle gradients carry the frame.
- Everything-at-once syndrome: I pick one subject per photo: foam trails, a lone surfer, a carved rock. Editing my intent in-camera makes the final set feel coherent.
Pre-Shoot Planning and Safety
Set an intention before I pack
I write one line in my notes app: what I want the photo to feel like and who it’s for. “Quiet dawn, soft edges, print for hallway.”
That single sentence guides lens choice, arrival time, and where I stand when the first wave arrives.
Check tides, swell, wind, and light
Look at tide tables first. Falling tides reveal rock pools, ripples, and reflective flats.
Rising tides tighten the safe zone and can trap me on outcrops. A quick glance at swell height and period tells me how punchy the waves will be, and wind direction decides whether I shoot into spray or work the sheltered side.
I also track sunrise/sunset and golden-hour windows so I’m not sprinting to the waterline as the best color fades.
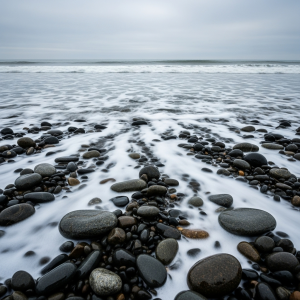
- Low tide goals: textures, tide-pool macro, mirror sand.
- Mid tide goals: flowing foam trails, leading lines.
- High tide goals: wave impact on cliffs, minimalist horizons.
Sort access and exit routes
Check parking, steps, and any slippery or algae-covered rocks. I plan two exits in case waves close the easy one.
If a path looks sketchy on the way down, I assume it will be worse in the dark on the way up and adjust the plan.
Pack a simple safety kit
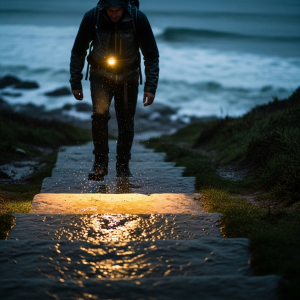
Keep it boring and effective: grippy shoes, headlamp with spare batteries, compact first-aid kit, microfiber towel, and dry bags. A thin rain cover for the camera lives in my pocket, and I stash a lens cloth in a zip-top bag so spray doesn’t turn every frame into fog.
Use a few reliable tools
I check a tide app, a basic weather app with hour-by-hour wind, and a sun-path tool so I know where light will hit the water and cliffs. Drop a pin for my car and a pin for the shoot spot.
If signal is patchy, I screenshot tide and weather pages before I leave.
Always keep a Plan B
If waves turn messy or fog rolls in, I pivot fast: telephoto abstracts of backlit spray, slower shutters on foam trails, or macro details in tide pools. I give myself permission to leave early if conditions get sketchy.
No image is worth a surprise swim.
Gear That Serves Connection

Cameras and lenses I actually use
I don’t overpack. One body and two or three lenses cover 95% of ocean work.
- Wide zoom (e.g., 16–35 mm): for immersive scenes, tide-pool reflections, and dramatic skies. At 16–20 mm I can lean into foreground textures without losing the horizon.
- Telephoto (e.g., 70–200 mm or 100–400 mm): for compressing wave layers, isolating backlit spray, and staying safely off slippery rocks. Compression makes head-high sets look colossal from a dry vantage point.
- Macro (90–105 mm or extension tubes): for anemones, barnacles, and sand ripples. When the light goes flat, macro saves the session with detail-led images.
I pre-mount the lens that fits my intention so I swap less when sand and spray try to invade everything.
Stabilization that survives sand and wind
Tripod first. Image stabilization helps, but it won’t hold 2–20 second exposures in gusts.
- Tripod with firm feet: spikes bite rock; wide rubber feet sit better on sand. I press legs into the beach for stability.
- Remote or 2-second timer: to avoid nudging the camera at slow shutters.
- Center column low or not at all: lower profile equals less wind shake.
Real-world win: on a breezy evening at Perranporth, dropping the tripod to knee height took my keeper rate from “iffy” to solid at 1.6 seconds.
Filters that do real work
- Circular polarizer (CPL): cuts glare, reveals tide-pool detail, and deepens color. Expect 1–2 stops of light loss. I rotate it while watching reflections disappear, then back off a touch to keep the sea natural.
- Neutral density (ND 3–10 stop): controls motion.
- 3–6 stops for 0.5–2 seconds to show flowing streaks.
- 10 stops for 15–60 seconds to soften chaos into calm.
- Graduated ND (soft edge): balances bright skies at sunrise/sunset. I still bracket occasionally, but a grad saves time when waves move fast.
Tip: keep a microfiber cloth in a zip bag and clean the CPL often. Spray builds up quickly and ruins contrast.
Protecting the kit without babying it
Salt isn’t gentle, so I keep a simple routine:
- Rain cover or shower cap: quick shield during squalls.
- Dry bag inside the backpack: doubles security if I set the bag on wet sand.
- Lens-change discipline: back to the wind, camera facing down, body cap ready. If it’s howling, I don’t change lenses at all.
- Post-shoot wipe-down: damp cloth on the exterior, then a dry one. I check tripod locks for sand before it grinds.
Small essentials that punch above their weight
- Spare batteries in a small dry pouch (cold wind drains them faster).
- Extra microfiber cloths and pre-cut lens tissues.
- Gaffer tape for quick fixes and sealing seams from spray.
- Thin gloves with grip so I can handle cold metal without fumbling.
- Headlamp with red mode for rock-hopping at blue hour without nuking my night vision.
When gear choices support the mood I’m chasing, I stop fiddling and start paying attention to the sea. That’s when the connection shows up in the frame.
Composition Frameworks That Feel Like the Sea
Build from the foreground up
I start by anchoring the frame with something tactile: foam trails, pebbles, a wet rock, or a reflection in a tide pool. Get low so textures stretch toward the viewer, then nudge the subject off-center to keep it dynamic.
If the water recedes, I press the shutter as lines pull seaward so the eye naturally follows the flow.
Keep the horizon intentional
Level the horizon first, then choose a high or low placement with a reason. High horizons highlight foreground stories like ripples and shells.
Low horizons emphasize sky drama or backlit spray. If I tilt, I do it boldly and only when the angle reinforces motion, like a wave racing across the frame.
Let the sea draw the lines
Waves leave perfect guides. I watch for receding streaks, pier shadows, or diagonal ripples and align my camera so those lines lead into the main subject.
It’s an easy way to turn chaos into structure without overthinking.
Show scale on purpose
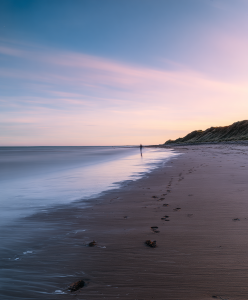
Water flattens distance, so I add a cue: a lone walker, a surfer waiting outside, or a flock of gulls. Keep them small but readable.
When I compress layers with a telephoto, even tiny figures can make head-high sets look monumental.
Layer for depth
Look for foreground texture, mid-ground wave forms, and a sky layer. Haze and sea spray naturally separate planes, so I step sideways until the layers stop overlapping awkwardly.
If the light’s flat, I use alternating light and dark bands of water to create a gentle rhythm.
Use minimalism for calm
When the mood is quiet, I strip the frame down. Clean horizon, generous negative space, and one subject.
Place the subject on a thirds line and let color gradients carry the emotion. Fewer elements, stronger feeling.
Wrap the Waves Into Your Frame
I shoot the ocean to feel present, and that starts with intent. Check tide, wind, and light, then choose a spot and a safe exit so I can focus.
My kit stays lean: one body, two lenses, a low tripod, and useful filters. On location, I translate mood into choices.
Shutter speed decides texture or flow, and clean compositions carry the emotion without clutter. I keep horizons deliberate and let leading lines guide the eye.
Ready to put this into practice? Use this approach to plan smarter sessions, stay safe, pick gear that serves the moment, and compose with clarity so images hold what you felt.
Block the next tide window, write one-line intent, and shoot a set: wide scene, motion study, and a detail. Share the results, review what worked, and refine on your next visit.
Repeat through seasons to deepen connection.