
These 3 easy DIYs to transform your apartment are my secret for making any space feel truly like home. I used to look around my place and feel so uninspired by the plain, standard-issue finishes and overall lack of personality.
It felt like I was just living in someone else’s box, not a space that reflected who I am. I dreamed of having a stylish, cozy home but assumed it would require a huge budget or professional help, things I just didn’t have.
That all changed when I discovered the power of a little creativity and some simple, hands-on projects. It is absolutely amazing how a few small, intentional changes can make the biggest impact.
I’m so excited to walk you through the exact projects I used to take my apartment from bland to beautiful, proving that you don’t need a lot of money or experience to create a home you absolutely love.
The Statement Wall: Your New Best Friend, Peel-and-Stick Wallpaper
Okay, let’s talk about the ultimate game-changer. If you’re going to do just one thing to completely revolutionize a room, this is it.
For the longest time, I was terrified of wallpaper. It brought up images of my grandma’s house and the nightmare stories I’d heard about steaming and scraping it off.
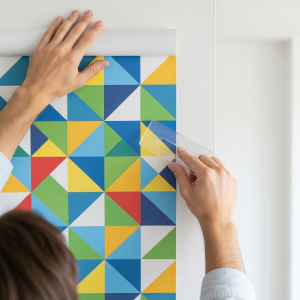
But then I discovered peel-and-stick wallpaper, and honestly, my life has not been the same since. It’s the perfect way to add a massive dose of personality and style to a room without the long-term commitment.
Why it Works: High Impact, Zero Heartbreak
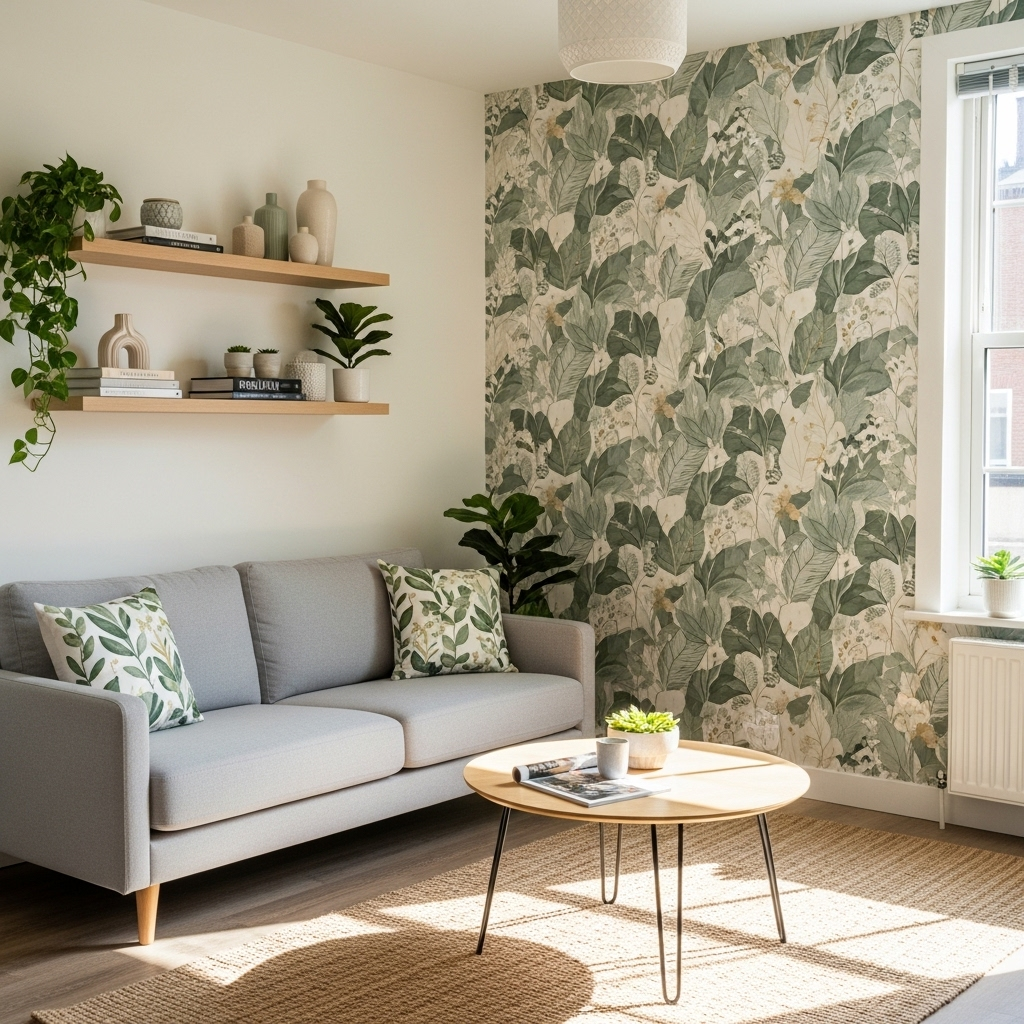
The beauty of removable wallpaper is right in the name—it’s removable! This makes it the perfect solution for creating a dramatic accent wall that looks incredibly high-end, without any stress.
Are you obsessed with a bold floral pattern today but worried you might be over it in a year? No problem.
Do you want to make your bedroom feel like a cozy, moody retreat? A dark, textured wallpaper behind your bed will do the trick instantly.
It’s all the visual impact of a professional paint job or traditional wallpaper, with none of the commitment anxiety. You get to have fun with trends, colors, and patterns, knowing you can just peel it off when you’re ready for a change.
What You’ll Need (Your DIY Toolkit)
Getting started is surprisingly simple, and you don’t need a bunch of fancy tools. Here’s my go-to list:
- Removable Wallpaper: The star of the show! My advice is to always order about 10-15% more than you think you need. This covers any “oops” moments and ensures you can match patterns perfectly.
- Measuring Tape: This is non-negotiable for getting your dimensions right.
- A Craft Knife or X-Acto Knife: You’ll need a sharp blade for clean, crisp edges at the ceiling and baseboards.
- A Smoothing Tool: You can buy a specific wallpaper smoothing tool, but I’ll let you in on a little secret: a simple plastic putty knife or even a credit card works wonders for pushing out air bubbles.
Your Step-by-Step Guide to a Flawless Wall
I promise, you can do this! Just take a deep breath and follow these steps.
- Prep Your Surface: Start by giving your wall a good wipe-down with a damp cloth to remove any dust or grime. A clean wall is a happy wall, and it helps the wallpaper adhere properly. Let it dry completely.
- Measure and Cut: Measure the height of your wall and cut your first strip of wallpaper, leaving an extra inch or two at the top and bottom. You’ll trim this off later for a perfect fit.
- The First Strip is Everything: This is the most important step for a professional look. Peel about a foot of the backing from the top of your first strip. Starting in a top corner, apply it to the wall, making sure it’s perfectly straight. You can use a level for this if you want to be extra precise.
- Smooth As You Go: Work your way down the wall, slowly peeling off the backing as you use your smoothing tool to press the wallpaper flat. Work from the center outwards to push any air bubbles toward the edges. If you get a stubborn bubble, don’t panic! You can often gently lift the paper and re-smooth it.
- Match and Repeat: For your second strip, carefully align the pattern with the first one. There’s usually a slight overlap designed into the wallpaper to make this seamless. Repeat the process of peeling and smoothing.
- The Final Trim: Once all your wallpaper is up, take your sharp craft knife and carefully trim the excess paper along the ceiling and baseboard. The result is a sharp, clean line that looks amazing.
And just like that, you have a stunning feature wall that makes the whole room pop.
Kitchen Upgrade: Say Goodbye to That Boring Backsplash
If the kitchen is the heart of the home, then my old kitchen had a serious case of the blahs. It was a sea of beige, and the bare wall between the countertop and the cabinets just screamed “boring!”
I always dreamed of having one of those gorgeous, tiled backsplashes I saw on Pinterest, but the thought of dealing with grout, tile saws, and a huge mess was overwhelming. Enter the hero of our kitchen story: peel-and-stick backsplash tiles.
This is, without a doubt, one of the most satisfying DIYs you will ever do.
The Wow Factor: Instant Modernization
You would be shocked at what a difference this makes. It’s a total transformation.
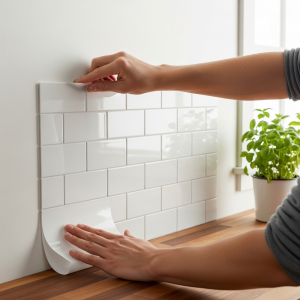
Adding a backsplash, even a faux one, instantly makes a kitchen look more finished, custom, and clean. Whether you love the classic look of white subway tiles, a trendy and colorful mosaic, or a sleek, modern geometric pattern, there’s a peel-and-stick option for you.
My kitchen went from feeling dated and generic to bright and intentional in a single afternoon. It’s the kind of upgrade that makes you smile every time you walk in to make your morning coffee.
Material List: Your Recipe for Success
You don’t need a contractor’s toolkit for this project, just a few simple items.
- Peel-and-Stick Tiles: These often come in sheets. Just like with the wallpaper, measure your area and buy a little extra to be safe.
- Ruler or Measuring Tape: For accuracy!
- Sharp Utility Knife or Scissors: You’ll need this for cutting tiles to fit around outlets and at the end of a wall. A straight edge, like your ruler, will help you get perfect cuts.
- Cleaning Supplies: A good degreasing cleaner is your best friend here to make sure the tiles stick properly.
The Application Process: So Easy You Won’t Believe It
Ready for this? It’s almost as easy as putting stickers in a sticker book.
- Clean, Clean, Clean: I can’t stress this enough. Kitchen backsplashes can have a hidden layer of grease and grime. Use a good degreaser to scrub the wall where you’ll be applying the tiles. Let it dry completely before you even think about sticking anything to it.
- Plan Your Starting Point: I find it easiest to start in a corner and work my way out. Do a “dry fit” by holding up a sheet of tiles to see how it will look and where you’ll need to make cuts.
- Peel and Stick: Peel the backing off your first tile sheet. Carefully line it up with your countertop and the corner of the wall. Press it firmly onto the wall, smoothing it out from the center to the edges.
- Overlap for a Seamless Look: Most of these tile sheets are designed to overlap slightly. The next sheet will fit right over a designated edge of the first one, making the seam disappear. It’s incredibly clever!
- Cutting Around Obstacles: When you get to an electrical outlet or a corner, measure and mark on the tile sheet where you need to cut. Use your sharp utility knife and a ruler to make a straight, clean cut. Peel the backing and fit it into place.
- Admire Your Work: Step back and look at what you did! In just a couple of hours, you’ve completely elevated the look of your kitchen. Voilà
Chic Storage: The Magic of DIY Floating Shelves
I have a confession to make: I am a collector of things. Cute mugs, little plants, interesting books, you name it.
The problem was that all my beloved “things” were quickly turning into clutter on every available surface. My countertops, my nightstand, my dresser—they were all overflowing.
I needed a solution that would let me display my favorite items without making my apartment look messy. The answer?
Floating shelves. These are an absolute lifesaver for adding storage and style at the same time.
Function Meets Form: A Match Made in Heaven
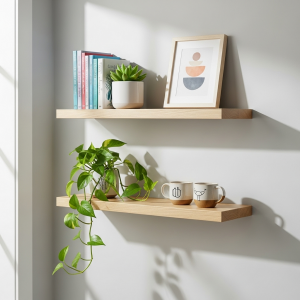
This is where practicality and personality truly come together. Floating shelves are amazing because they draw the eye upward, making a room feel taller and more open.
Unlike a bulky bookcase, they have a light, airy feel. You can use them in literally any room.
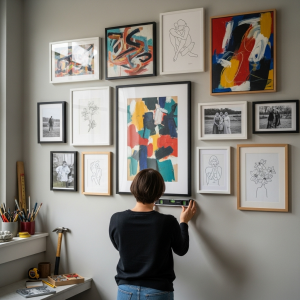
In the kitchen, they’re perfect for holding everyday dishes, spices, or your coffee station essentials. In the living room, they become a stage for your favorite art, photos, and plants.
In my bathroom, I use them to hold pretty jars of cotton balls and my skincare products, turning everyday items into decor. It’s all about getting stuff off your surfaces and turning it into a curated display on your walls.
Your Hardware Store Shopping List
Don’t be intimidated by a trip to the hardware store! This is a super straightforward project. Here’s what you’ll need to grab:
- Wood Planks: The fun part! You can get inexpensive pine boards and stain or paint them any color you like. Or, you can often find pre-finished boards that are ready to go.
- Brackets: The style options are endless! You can find sleek, modern metal brackets, rustic industrial pipe brackets, or even “invisible” brackets that hide inside the shelf for a true floating look.
- Screws: You’ll need longer screws to attach the brackets to the wall and shorter ones to attach the shelf to the brackets. The bracket packaging will usually tell you what size you need.
- A Level: This little tool is your best friend for making sure your shelves don’t end up crooked. Trust me, don’t skip this!
- A Drill: A basic power drill will make this job a thousand times easier.
Installation Guide: You’ve Got This!
Putting up shelves might seem like a big deal, but it’s totally manageable. Here’s how we do it:
- Plan Your Placement: Decide where you want your shelves to go. I like to use painter’s tape to mark out the spot on the wall so I can step back and see how it looks before I drill any holes.
- The All-Important Studs: To make your shelves super sturdy, you want to screw the brackets into the studs (the wooden support beams inside your walls). The easiest way to find them is with a stud finder. If you can’t line up with a stud, don’t worry! You can use drywall anchors, which are little plastic sleeves that expand behind the drywall to hold a screw securely.
- Mark Your Holes: Hold your first bracket against the wall where you want it, and use your level to make sure it’s perfectly vertical. Use a pencil to mark where you need to drill. Do the same for the second bracket, but this time, lay the level across the top of both brackets to ensure they are even with each other.
- Drill and Mount: Drill pilot holes on your pencil marks. This makes it easier to get the screws in. Then, line up your bracket and drill the screws in until the bracket is tight against the wall.
- Secure the Shelf: Place your wood plank on top of the mounted brackets. From underneath, use shorter screws to attach the board to the brackets. This keeps it from sliding around.
Now for the best part—styling! Arrange your books, plants, and treasures and enjoy your beautiful, clutter-free new space.
Your Home, Your Masterpiece!
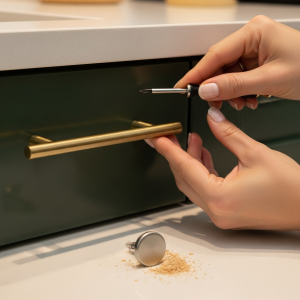
I hope you’re feeling as inspired and empowered as I did when I first realized that creating a beautiful home was completely within my reach. We’ve walked through some of my absolute favorite transformations, from the huge impact of a statement wall to the tiny details like new cabinet hardware that make all the difference.
It’s amazing to see how a little bit of effort can completely reshape your environment. You now have a full toolkit of ideas to turn any room from a blank canvas into a space that feels uniquely and wonderfully you.
So, what are you waiting for? This guide is your permission slip to finally start.
Pick the one project that sparked the most joy for you—maybe it’s the instant gratification of a peel-and-stick backsplash or the satisfaction of displaying your treasures on new floating shelves. By taking that first step, you’re not just decorating; you’re investing in your own happiness and creating a personal sanctuary.
Go ahead, begin your transformation journey today and build a home you absolutely adore living in.